Repairing Adam A5X nearfields

In the past year or so my trusty Adam A5X nearfield monitors had started making an awful buzzing noise. It was relatively quiet at first, and the worst of it would subside within about half an hour of powering on and listening to stuff. I was fairly good at ignoring the problem until it finally grew absolutely unbearable, like a swarm of pissed off wasps stinging my poor earholes.
It was time to either face the issue and do something about it, or chuck the speakers and get new ones. I played around with the idea of just getting new ones - after all, this pair of A5Xs had already served me for most of my adult life, probably close to ten years. The A5X is no longer manufactured, but Adam has recently released a refreshed lineup of the series, where the A5X has been superseded by the Adam A4V.
I have no doubt that the A4V is a fantastic speaker, but it is unfortunately also even more expensive, mostly due to additional features I don't really care about.
Apart from not really having the spare cash to put into new speakers right now, the thing is that I don't actually want to change speakers, either, as all these years I've been producing, recording, mixing and mastering music and other audio on the A5Xs. They are what I've developed my listening skills against, and for professional audio work a stable reference point is much more valuable than chasing a better sound. (Not to mention that the A5Xs sound really good already.)
Alright, so repairs it is. I thought about paying someone to do it, but the whole thing felt like too much of a hassle, plus if I was going to spend any considerable money I might as well have looked into new speakers again.
Now, I'd never opened an active speaker before, particularly not a high-end studio device. But electronics isn't rocket surgery, I just had to dig up some equipment and get to it. Incidentally, I couldn't find any existing guide or teardown of these speakers, so I decided to do this tiny writeup myself.
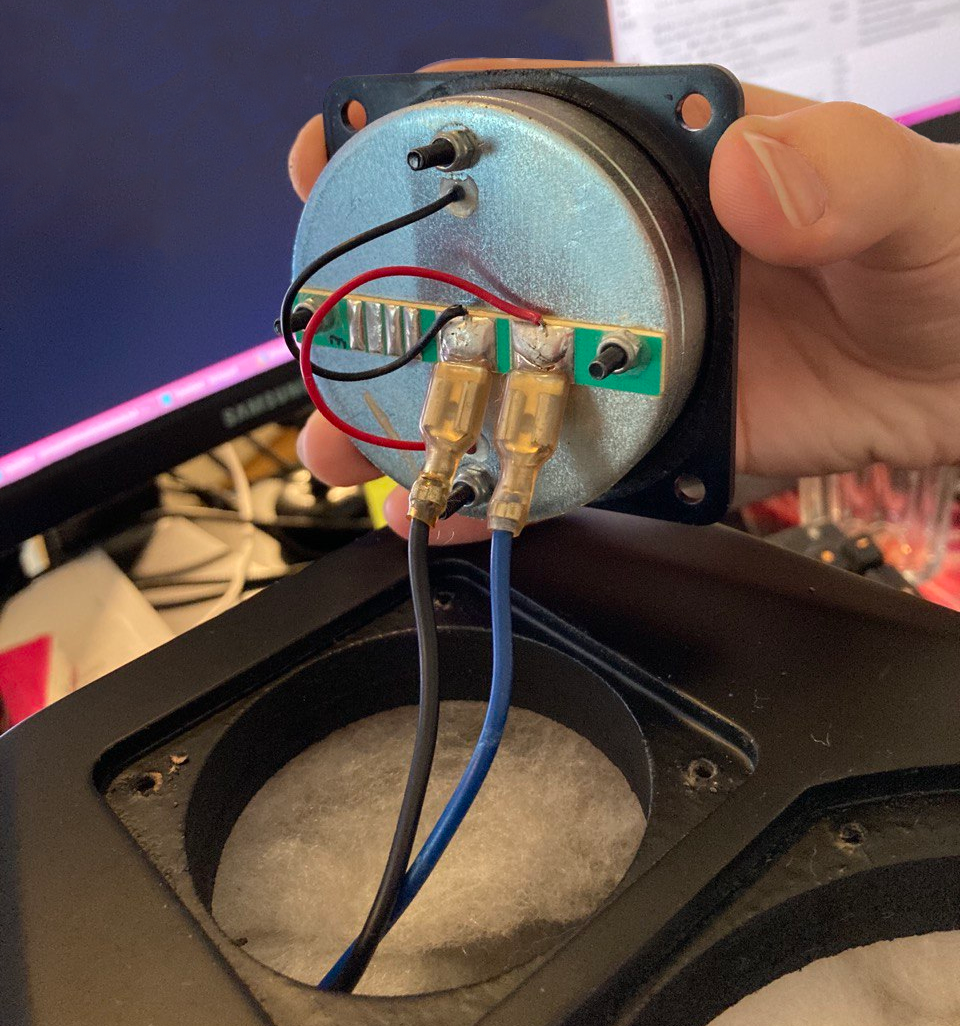
To get cracking, you'll first want to unscrew the front elements, the woofer and the tweeter. Chances are, however, that they still won't come loose without pushing them out from the inside.
To do that, you'll want to unscrew these screws from the backplate:
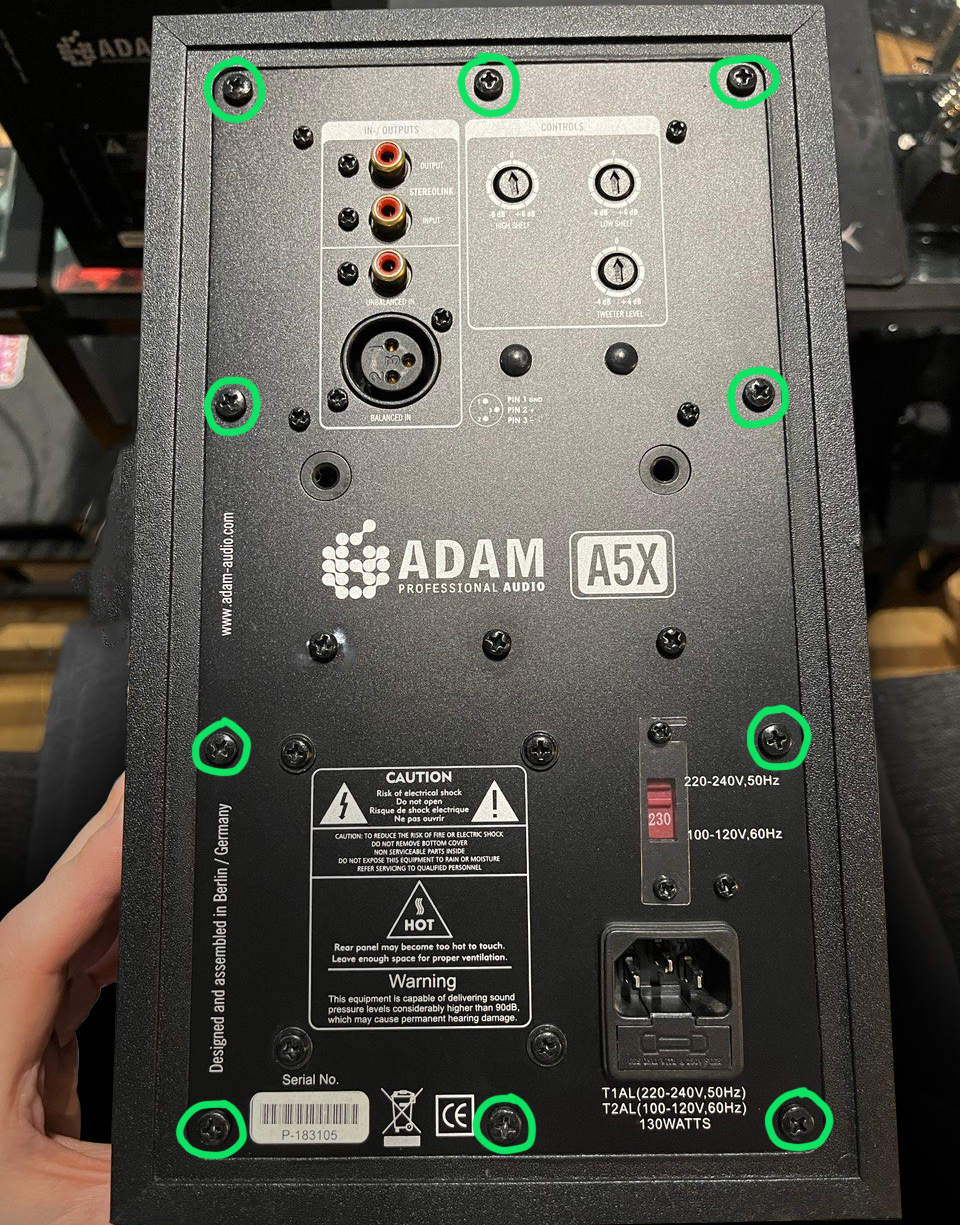
The other screws hold the electronics to the plate and should stay on.
Removing these screws and gently thumping the bottom against something soft a few times should make the plate drop out. Be careful as it is very heavy, as all the electronics reside on the backboard. Anyway, the modules are pretty tightly connected to some cables inside. You most likely won't be able to pull out the whole thing yet, but there should be enough space near the top to reach inside to carefully push the tweeter and woofer out from the front panel.
Disconnect the wires from the elements and put the elements aside. The blue-black pair goes to the tweeter and and red-black pair to the woofer.
Then remove the white fluff (it's glued in a couple of places, just rip it out carefully), and this should be the sight:
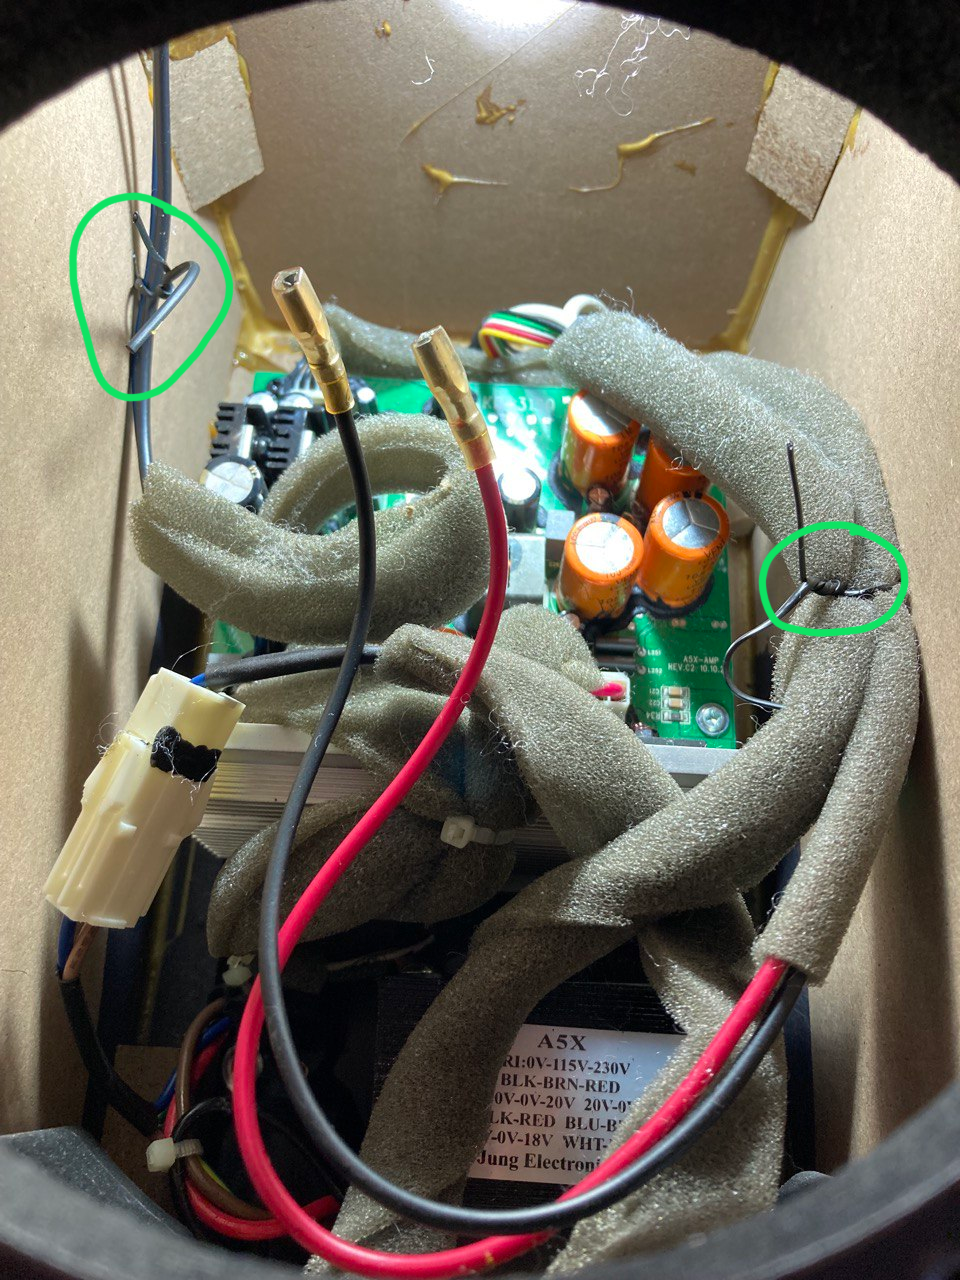
Undoing the circled cable ties on the sides should let you then pull out more of the backside and start disconnecting the other inter-module cabling inside.
This is where your fight against the black gunk begins, as it's already on most of the connectors, securing them permanently together.
Depending on how old your speaker is and how hot you've driven it, there's two methods to removing the gunk. One is scraping with a flathead screwdriver, but this should be the last option as it's much easier to damage parts this way.
The better method is to grab as big a chunk of the gunk at once as you can with needle nose pliers, then pull it off hoping it won't break. This works pretty well unless the gunk has turned into complete crisp, in which case scraping is the only option.
So remove the gunk and disconnect all the connectors still holding the back-module to the insides.
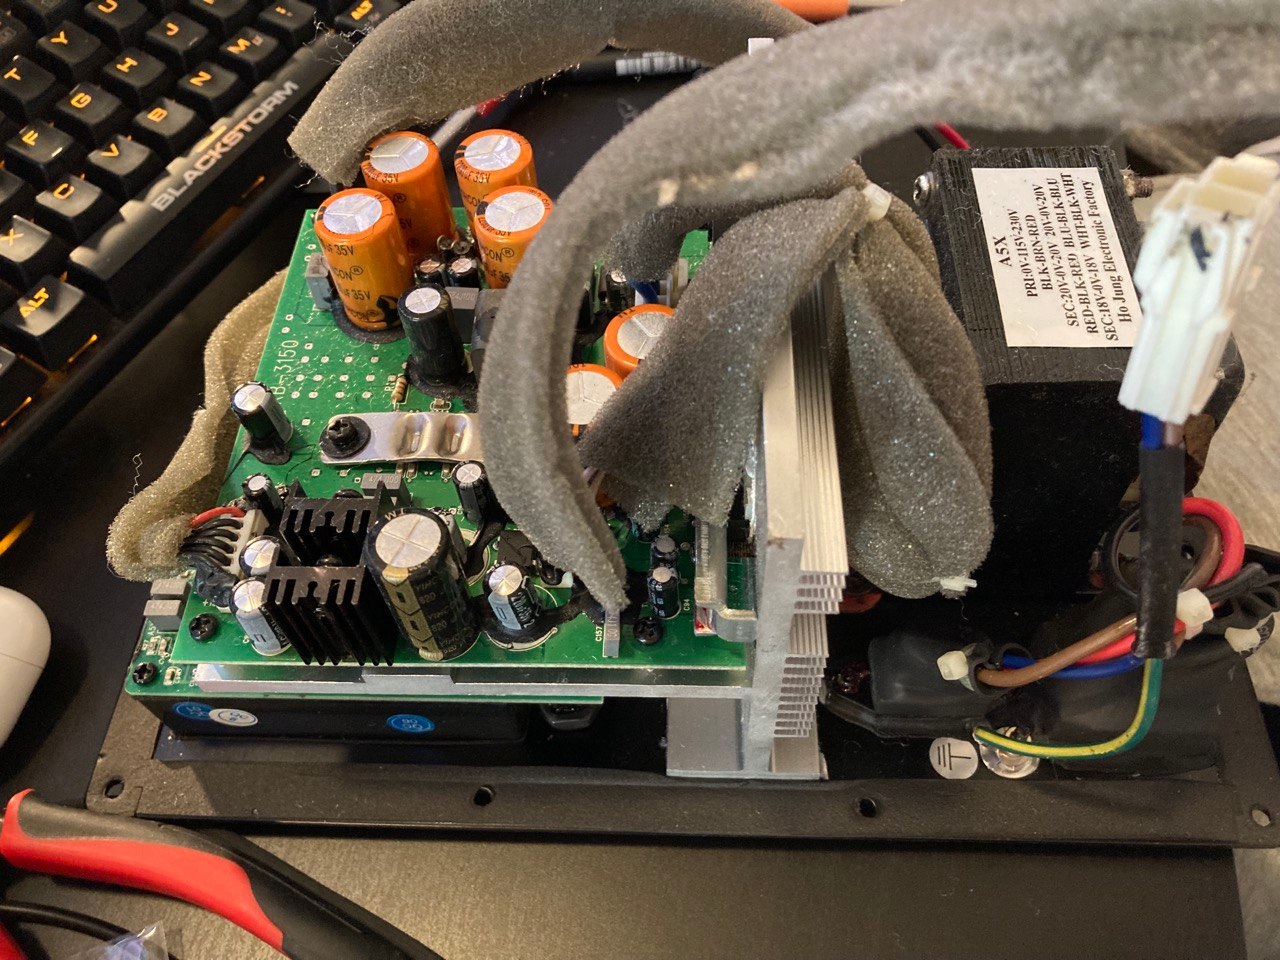
Alright, now the beast is out. Thankfully all the power supply and connection stuff is on the lower level. The main suspect you'll want to work on is the amplifier circuit on top.
Disconnect the rest of the connectors and start taking off the screws.
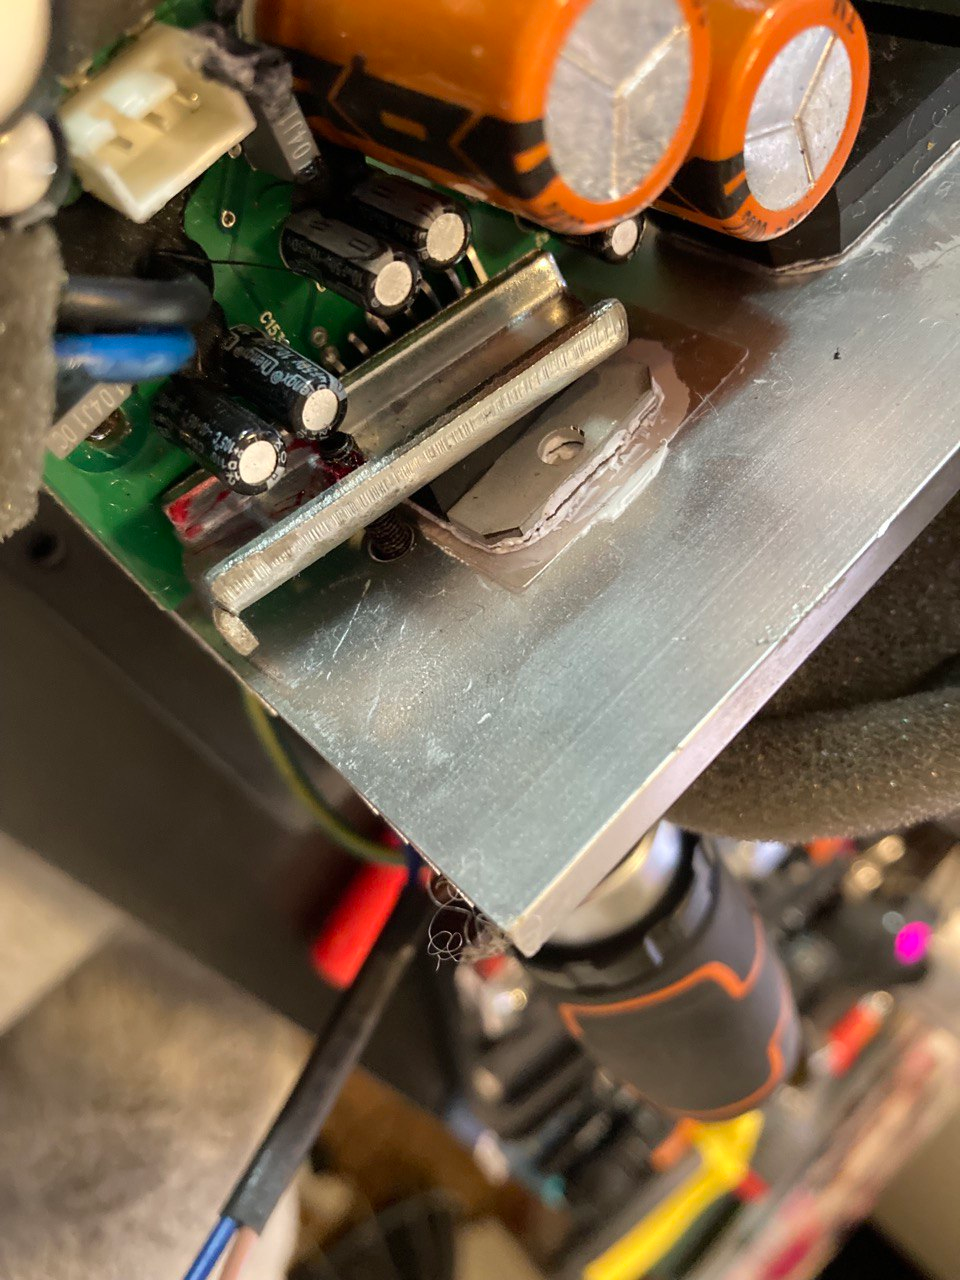
The amplifier module is held down neatly with a number of these smaller black screws, and the three large rectifiers are screwed tight against the heatsink to the side. The metal strip in the middle of the board is there to push down the TDA D/A chip on the other side of the board against the heatsink below. Remove that as well.
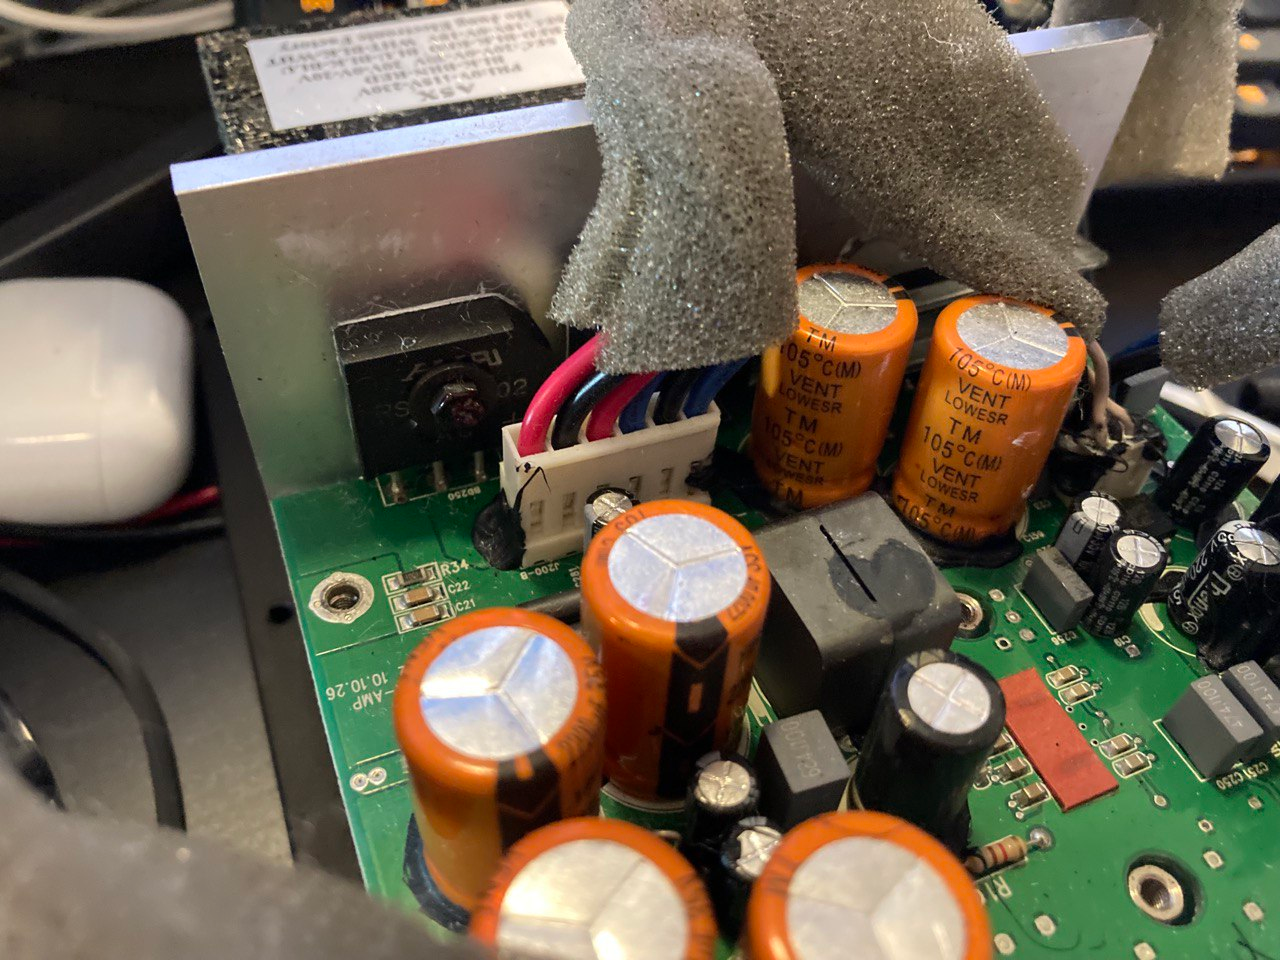
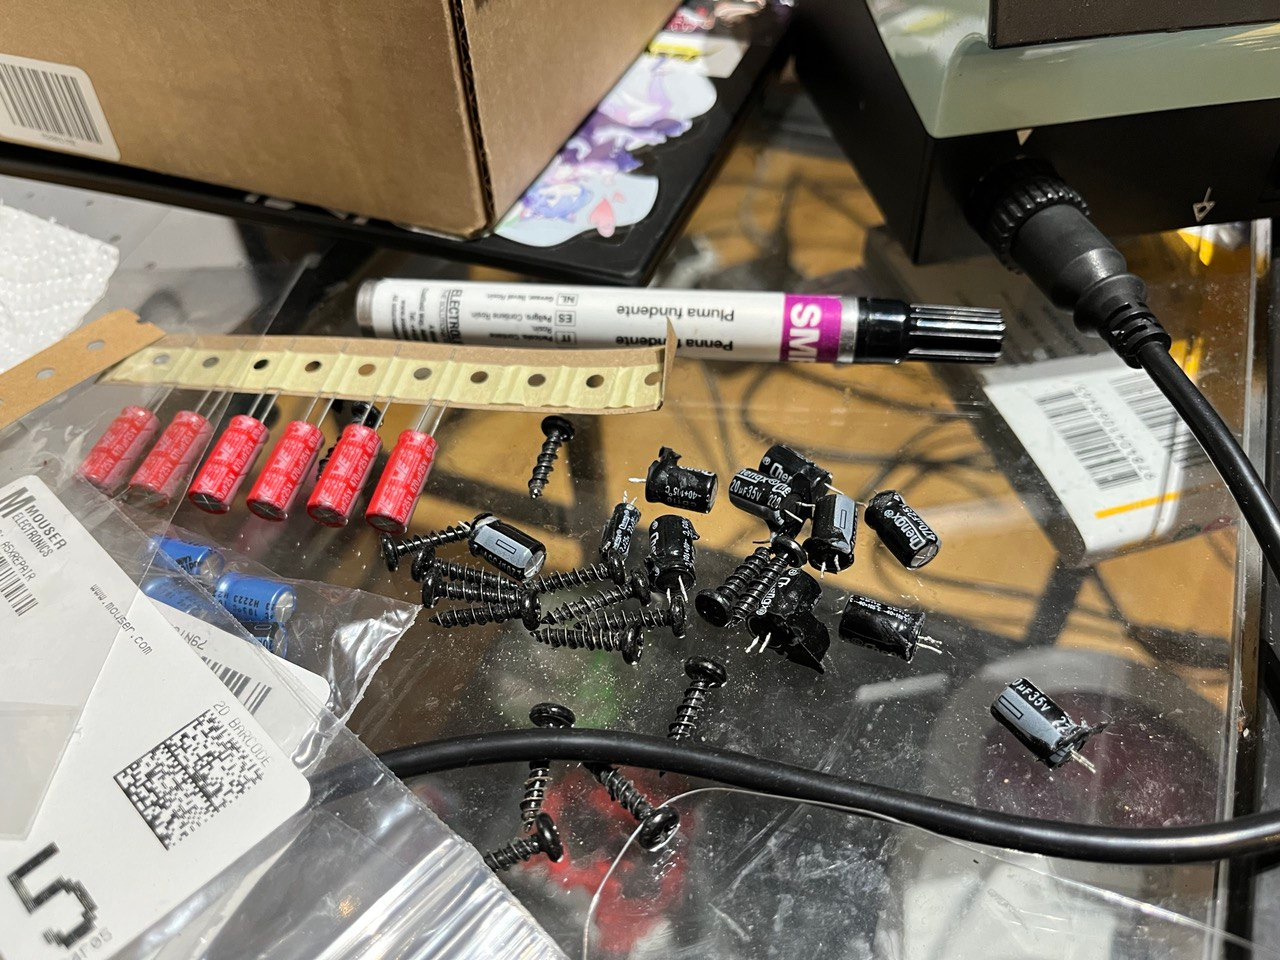
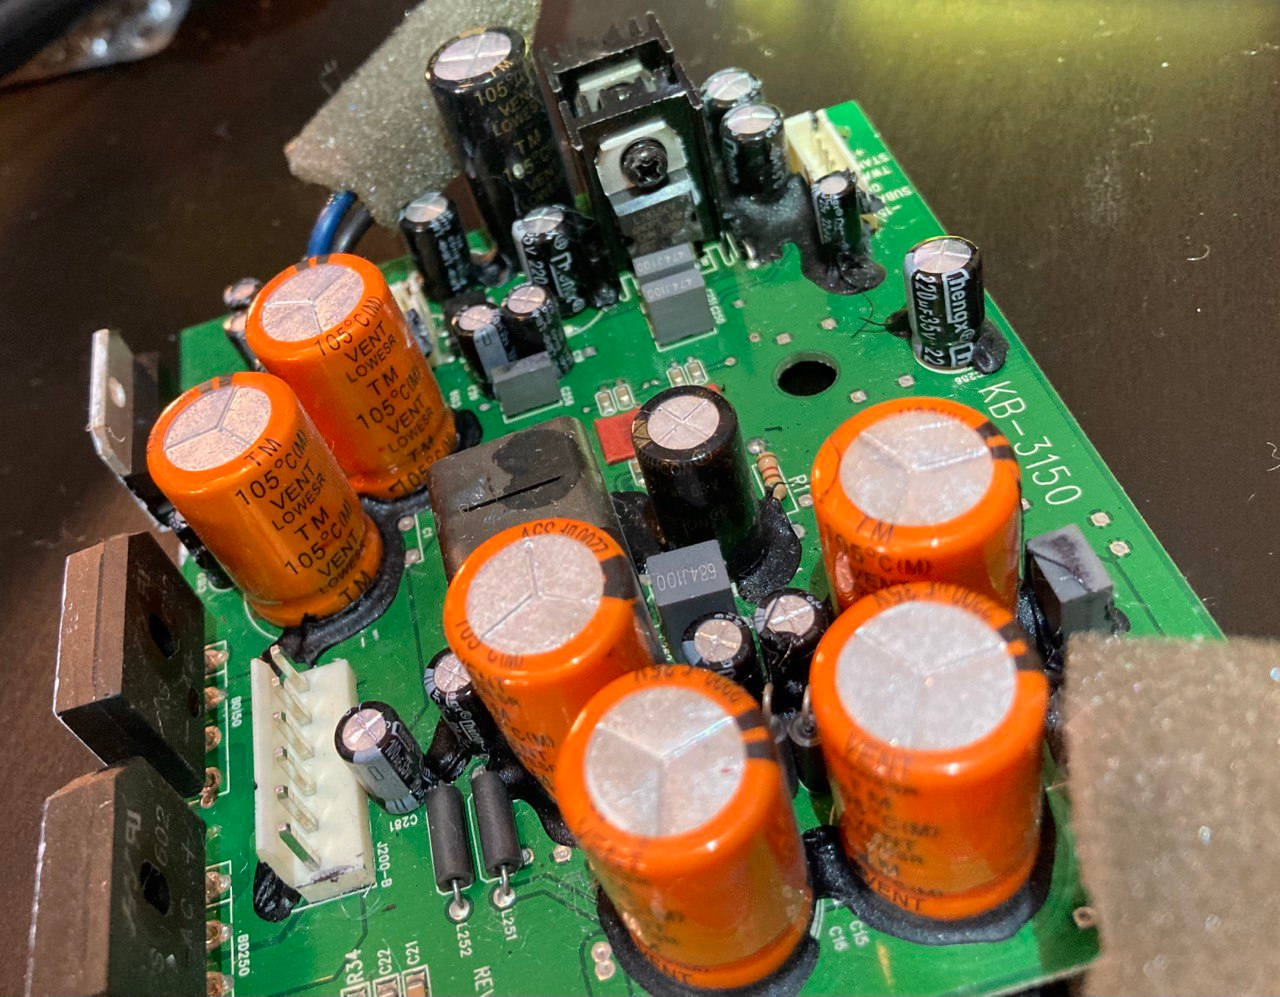
Now that the amplifier board is freed, you can start examining it for issues. Mine was instantly obvious: a ton of blown caps.
The board contains the following likely candidates for issues, in case you want to be prepared beforehand:
- 470μF radial caps @ 25V, diam 8mm, leads 3.5mm
- 220μF radial caps @ 35V, diam 3mm, leads 3.5mm
- 100μF radial caps @ 35V, diam 6.3mm, leads 2.5mm
- 2200μF radial caps @ 35V, diam 16mm, leads 7.5mm
- 820μF radial caps @ 63V, diam 12.5mm, leads 5mm
- 220μF radial caps @ 100V, diam 12.5mm, leads 5mm
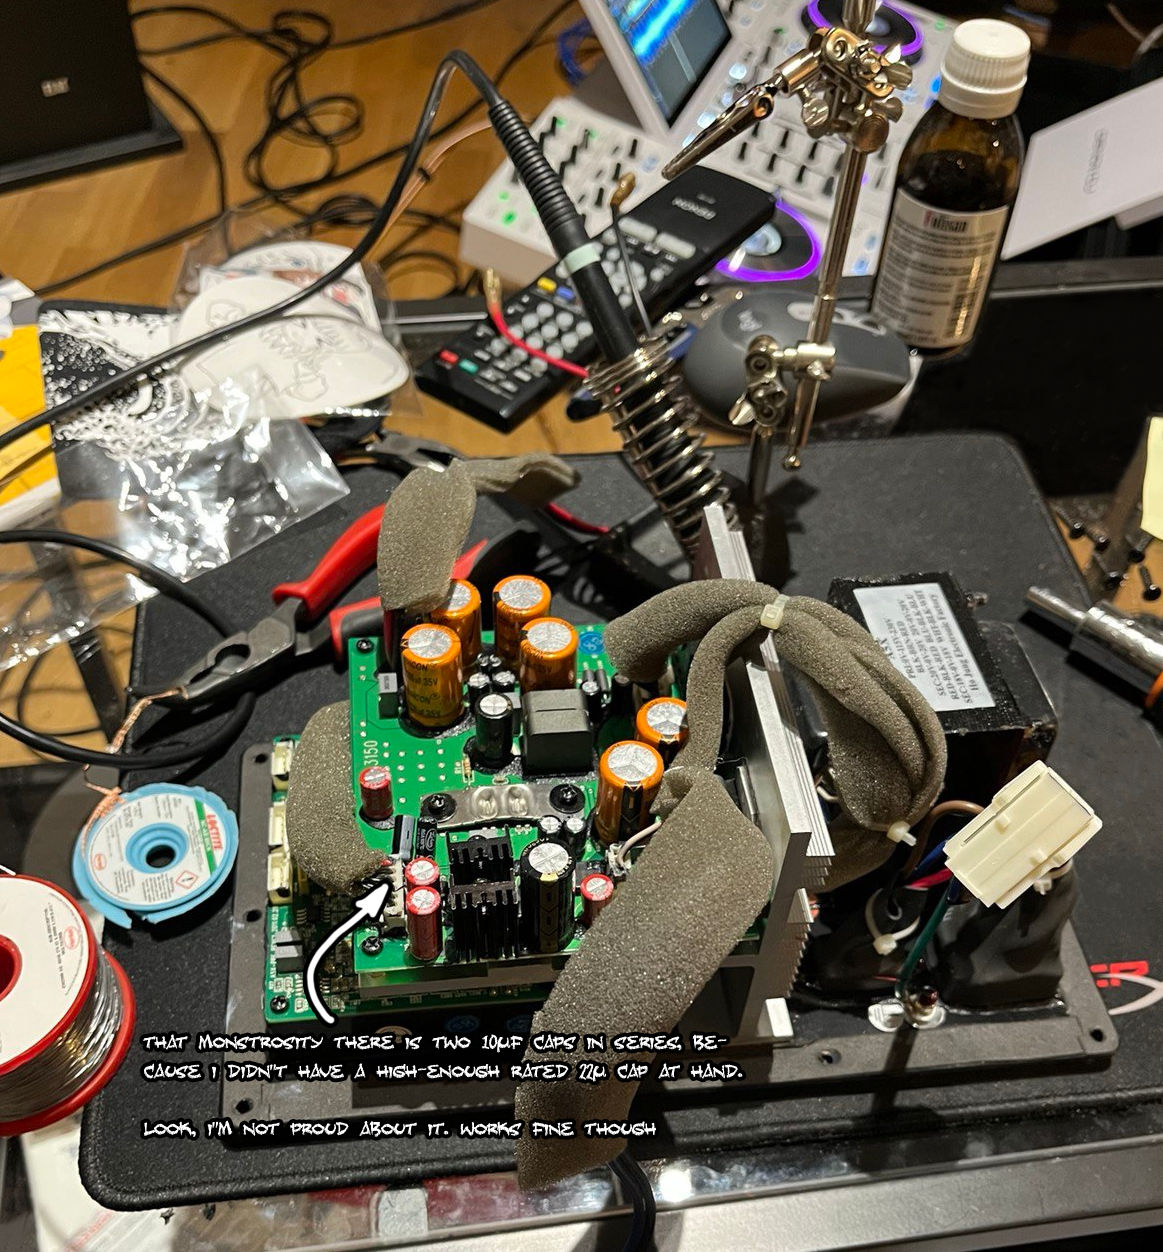
- 22μF radial cap @ 25V at whatever the usual diameter is
- STmicro L7815CV-DG regulators
All the big capacitors are Yihcon, and all the small ones are Cheng.
Perhaps unsurprisingly, every blown cap in my case was a Cheng, and every Yihcon cap was perfectly fine. I was also prepared to replace any fried regulators, but the L781s turned out to be fine as well.
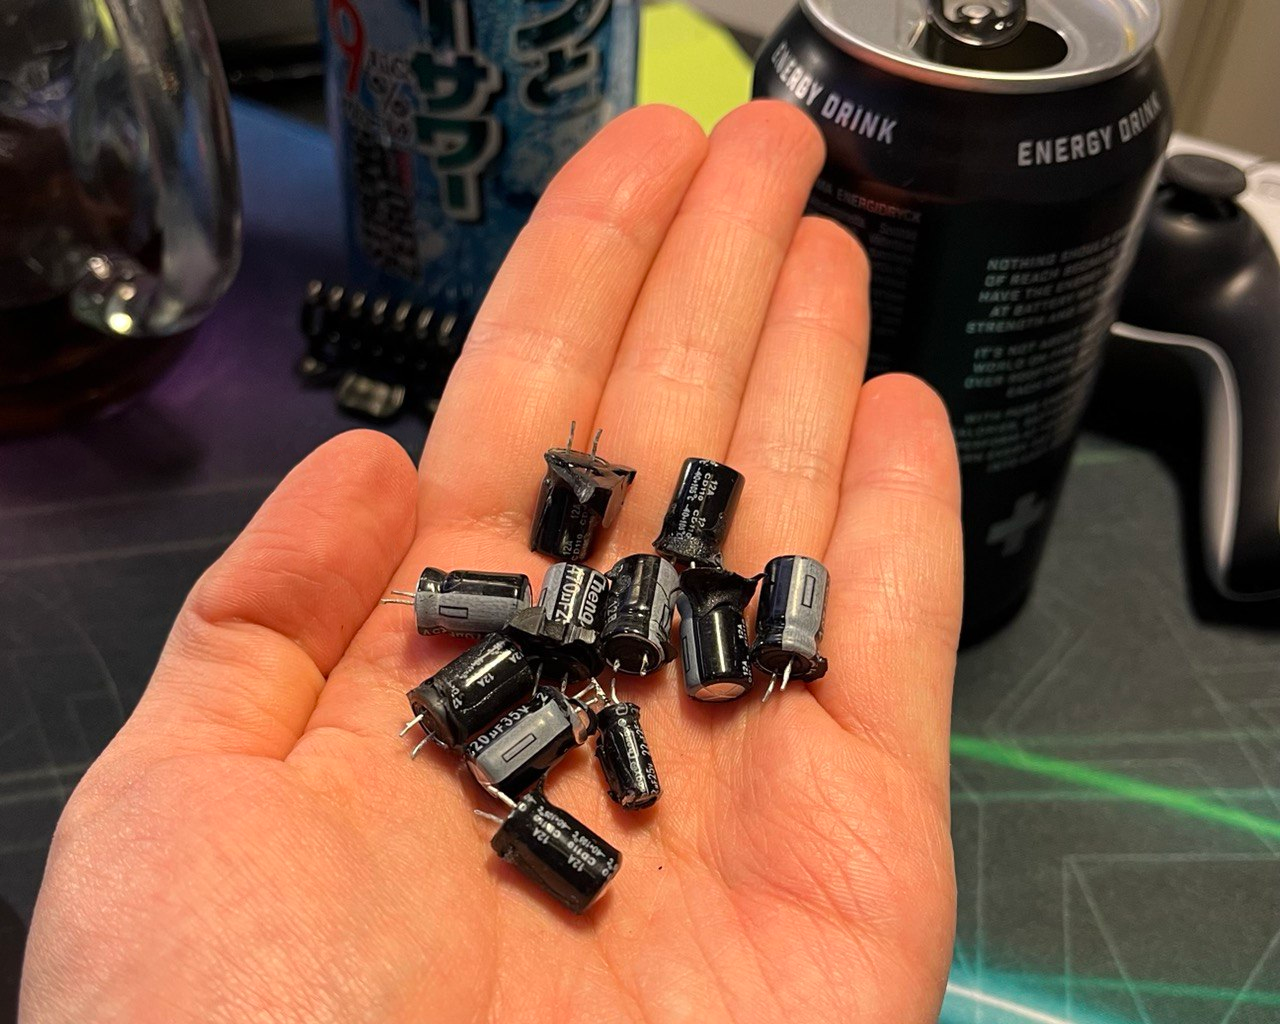
Across two speakers, I ended up replacing 11 capacitors.